
Balloon Powered Delivery Vehicle
Overview
You are an engineer designing a smart delivery vehicle powered by stored renewable energy.
Your vehicle will be powered by compressed air stored inside a balloon. Just like real renewable energy systems (such as wind and solar), energy must be stored and used efficiently. Your job is to design a vehicle that uses its stored energy wisely to deliver a payload accurately and efficiently.
Activity Objectives:
Design and build a balloon-powered vehicle
Test how far and how accurately it travels
Analyze how energy is used (and lost)
Improve your design through iteration
Engineers rarely get things perfect on the first try; testing and redesigning is part of the process.
Performance Goals:
Your vehicle should aim to:
Travel efficiently using one inflation
Carry a small payload (if assigned)
Stay straight and controlled
Stop close to a target zone
Efficiency matters more than speed alone.
Materials (per kit):
You have intentionally been given extra materials so you can experiment and improve your design. You may use additional recyclable materials for your payload if instructed.
Mobility Components:
4 small plastic wheels
3 wooden dowels (axles)
6 straws (for bushings or air channel)
3 rubber bands (traction or alternate testing)
Energy System:
3 balloons
3 binder clips
Structure Materials:
3 pieces of cardboard
8 popsicle sticks
4 twist ties
1 roll of tape
Instructions:
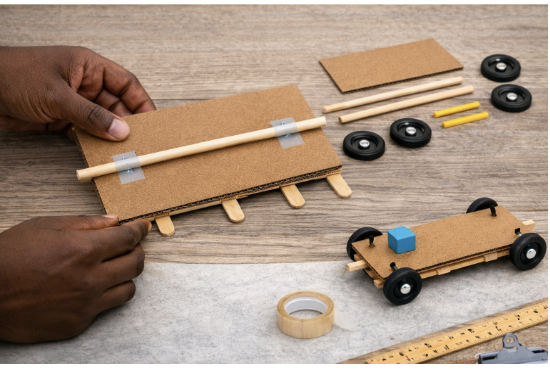
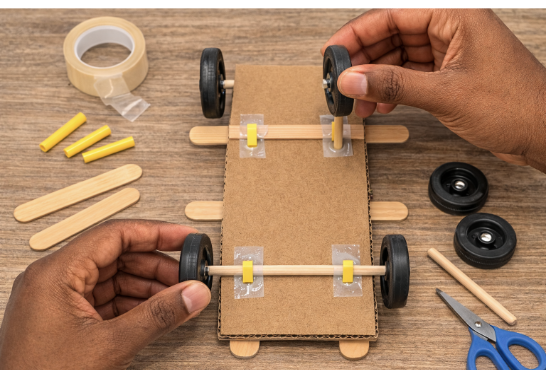
STEP 1: Build Your Chassis
Choose one piece of cardboard as your base.
Decide where your axles (dowels) will go.
Cut small sections of straw (about 1 inch long).
Tape the straw pieces to the underside of your cardboard — these act as bushings (low-friction sleeves).
Slide the dowels through the straw bushings.
Attach wheels to each end of the dowels.
Pro Tip: While building your chassis, make sure the wheels spin freely, axles are straight and nothing rubs or drags.
STEP 2: Build Your Energy System
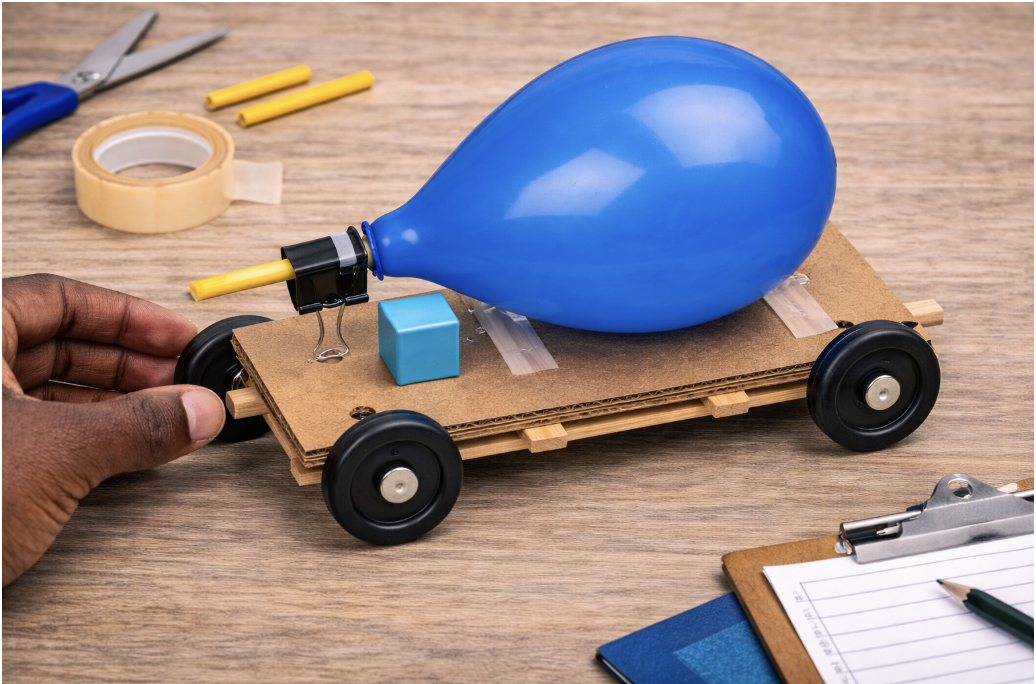
Insert a straw into the opening of a balloon.
Seal it tightly using tape or a twist tie (no air leaks).
Attach the balloon to the top of your vehicle.
Use a binder clip to pinch the straw closed after inflating.
When ready to test, release the clip to let the air escape. Your balloon is your stored energy system.
STEP 3: Your First Test Run
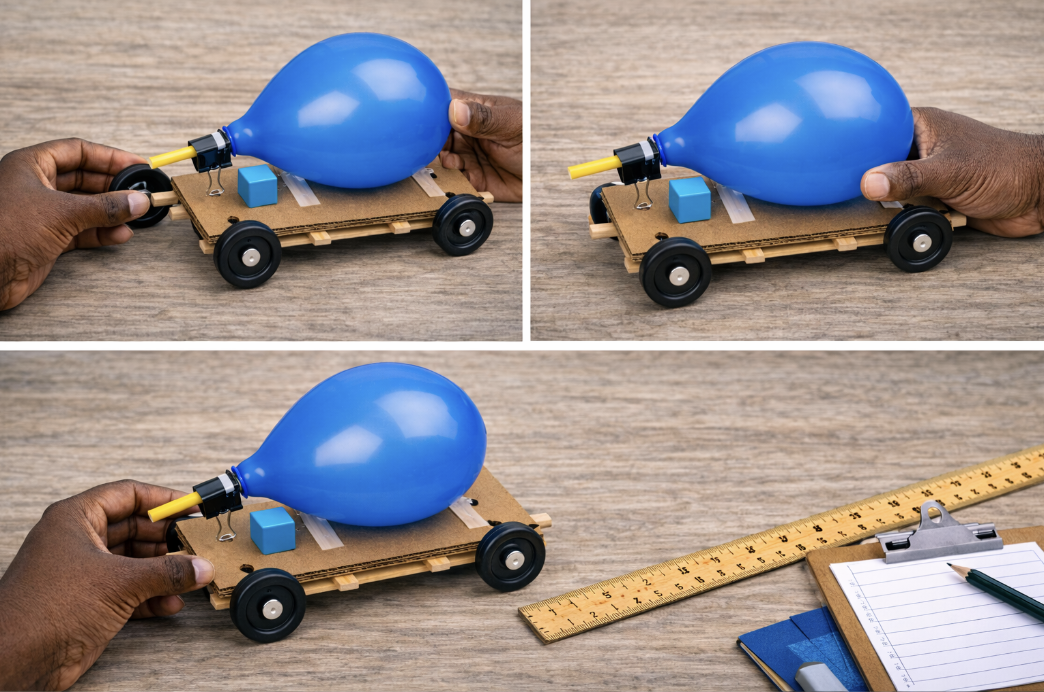
Before inflating your ballon:
Check wheel alignment.
Make sure axles spin smoothly.
Ensure that the balloon is securely attached.
Testing Rules:
Inflate once.
No pushing allowed.
Release and observe.
Measure (Record your results):
Distance traveled
Accuracy (Did it stay straight?)
Stability
Payload performance (if added)
STEP 4: Analyze Energy Efficiency
After your test, ask yourself:
Did the vehicle go straight?
Did it wobble?
Did it stop too soon?
Did energy escape too quickly?
Was friction slowing it down?
Was it too heavy?
Where did energy get lost?
Pro Tip: A few common areas where energy losses occur includes: Axle friction, Misaligned wheels, Air leaks, Excess weight, Drag from balloon position
STEP 5: Improve your Design

Now redesign your vehicle using what you learned. Test again and compare results. Engineers improve through iteration. Areas you can modify include:
Wheel placement
Axle alignment
Balloon position
Vehicle weight
Reinforcement structure
Traction (rubber bands on wheels)
Airflow direction
STEP 6: Final Reflection
After testing and modifying, respond to these questions:
What design change made the biggest improvement?
Where did your system lose the most energy?
How did weight affect performance?
How did friction affect your results?
If you had unlimited materials, what would you improve?
How does this model relate to real renewable energy systems?
What tradeoffs did you have to make?
Looking for more fun? Explore our Resources Page for even more activities and subscribe to our newsletter to get the latest news and updates.