
Build a Microscope
Overview
A microscope is a scientific instrument used to view objects that are too small to be seen by the naked eye. It is composed of one or more lenses that produce an enlarged image of a specimen. The main components include:
Eyepiece (or ocular): The lens the viewer looks through.
Objective Lenses: A set of lenses on a rotating turret, offering different levels of magnification (e.g., 4x, 10x, 40x).
Stage: A flat platform where the specimen slide is placed.
Illuminator and Diaphragm: The light source and an adjustable aperture that controls the amount and cone of light passing through the specimen to adjust brightness and contrast.
Did you know?
The earliest microscopes were known as “flea glasses” because they were used to study small insects.
Anton van Leeuwenhoek engineered high-powered lenses that allowed him to discover a world of teeming bacteria in a single drop of water.
Robert Hooke is credited with discovering the cell after he observed the small, honeycomb-like compartments in a piece of cork with his microscope.
Design Challenge:
Explore how a simple water drop can act as a lens to magnify the hidden world around you.
Build a water-drop microscope and look at a single crystal of salt. What is its true shape?
Now, add another drop of water directly onto the salt crystal and watch what happens to its structure.
Look at a white phone screen through your lens. Can you see the tiny red, green, and blue lights?
Materials:
Ziplock bag (cut a flat, clear piece from the side)
Index card, cardstock, or thick paper
Tape or rubber band
Scissors
Water
Straw or dropper
White paper or small dish
Small items to examine (e.g., sugar, salt, thread, printed text)
Flashlight or phone light (optional)
Build Instructions:
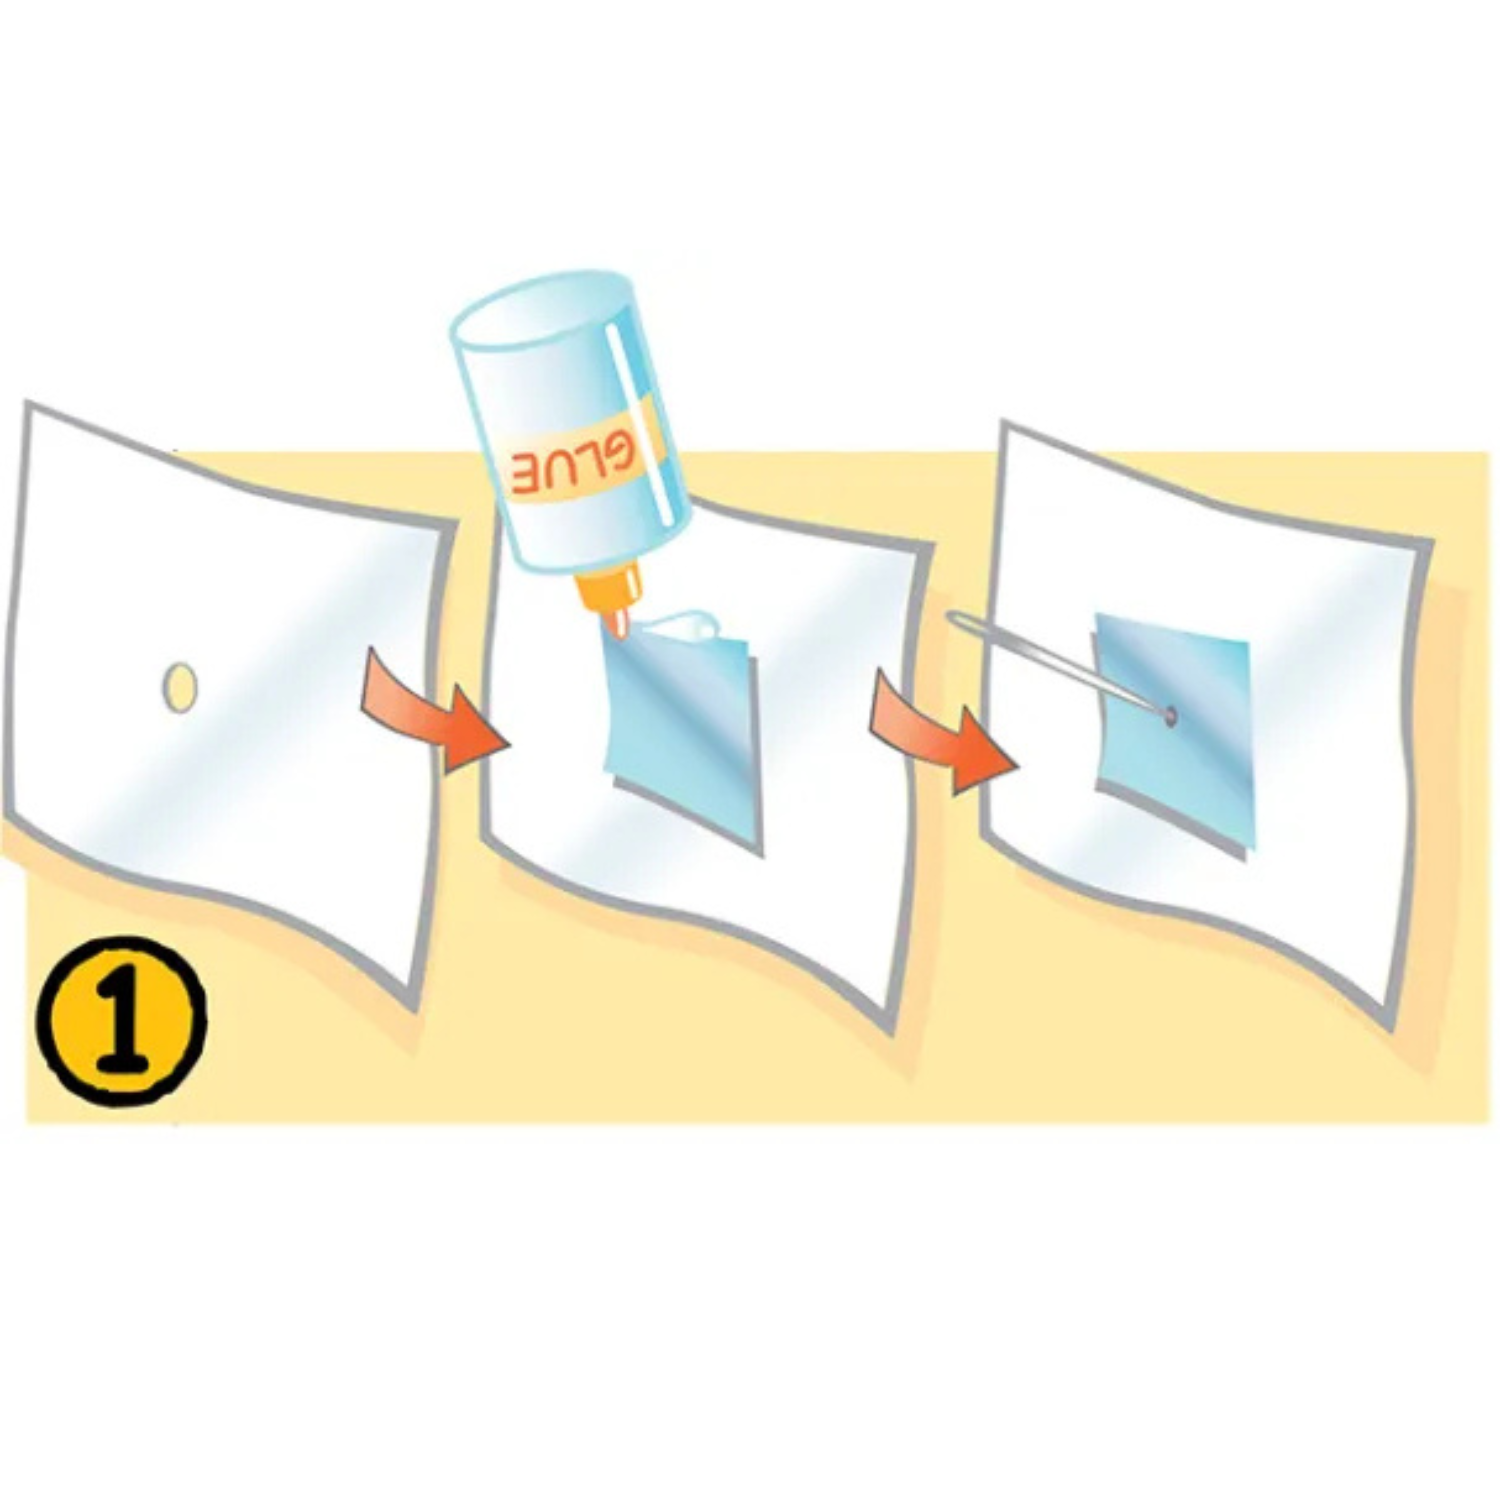
1. Prepare the Frame
Cut a square window (about 1–1.5 inches wide) in the center of your index card or cardstock.
Cut a flat, clear piece of plastic from the ziplock bag (larger than the hole).
Tape or rubber band the plastic tightly over the window—try to make it as smooth and wrinkle-free as possible.
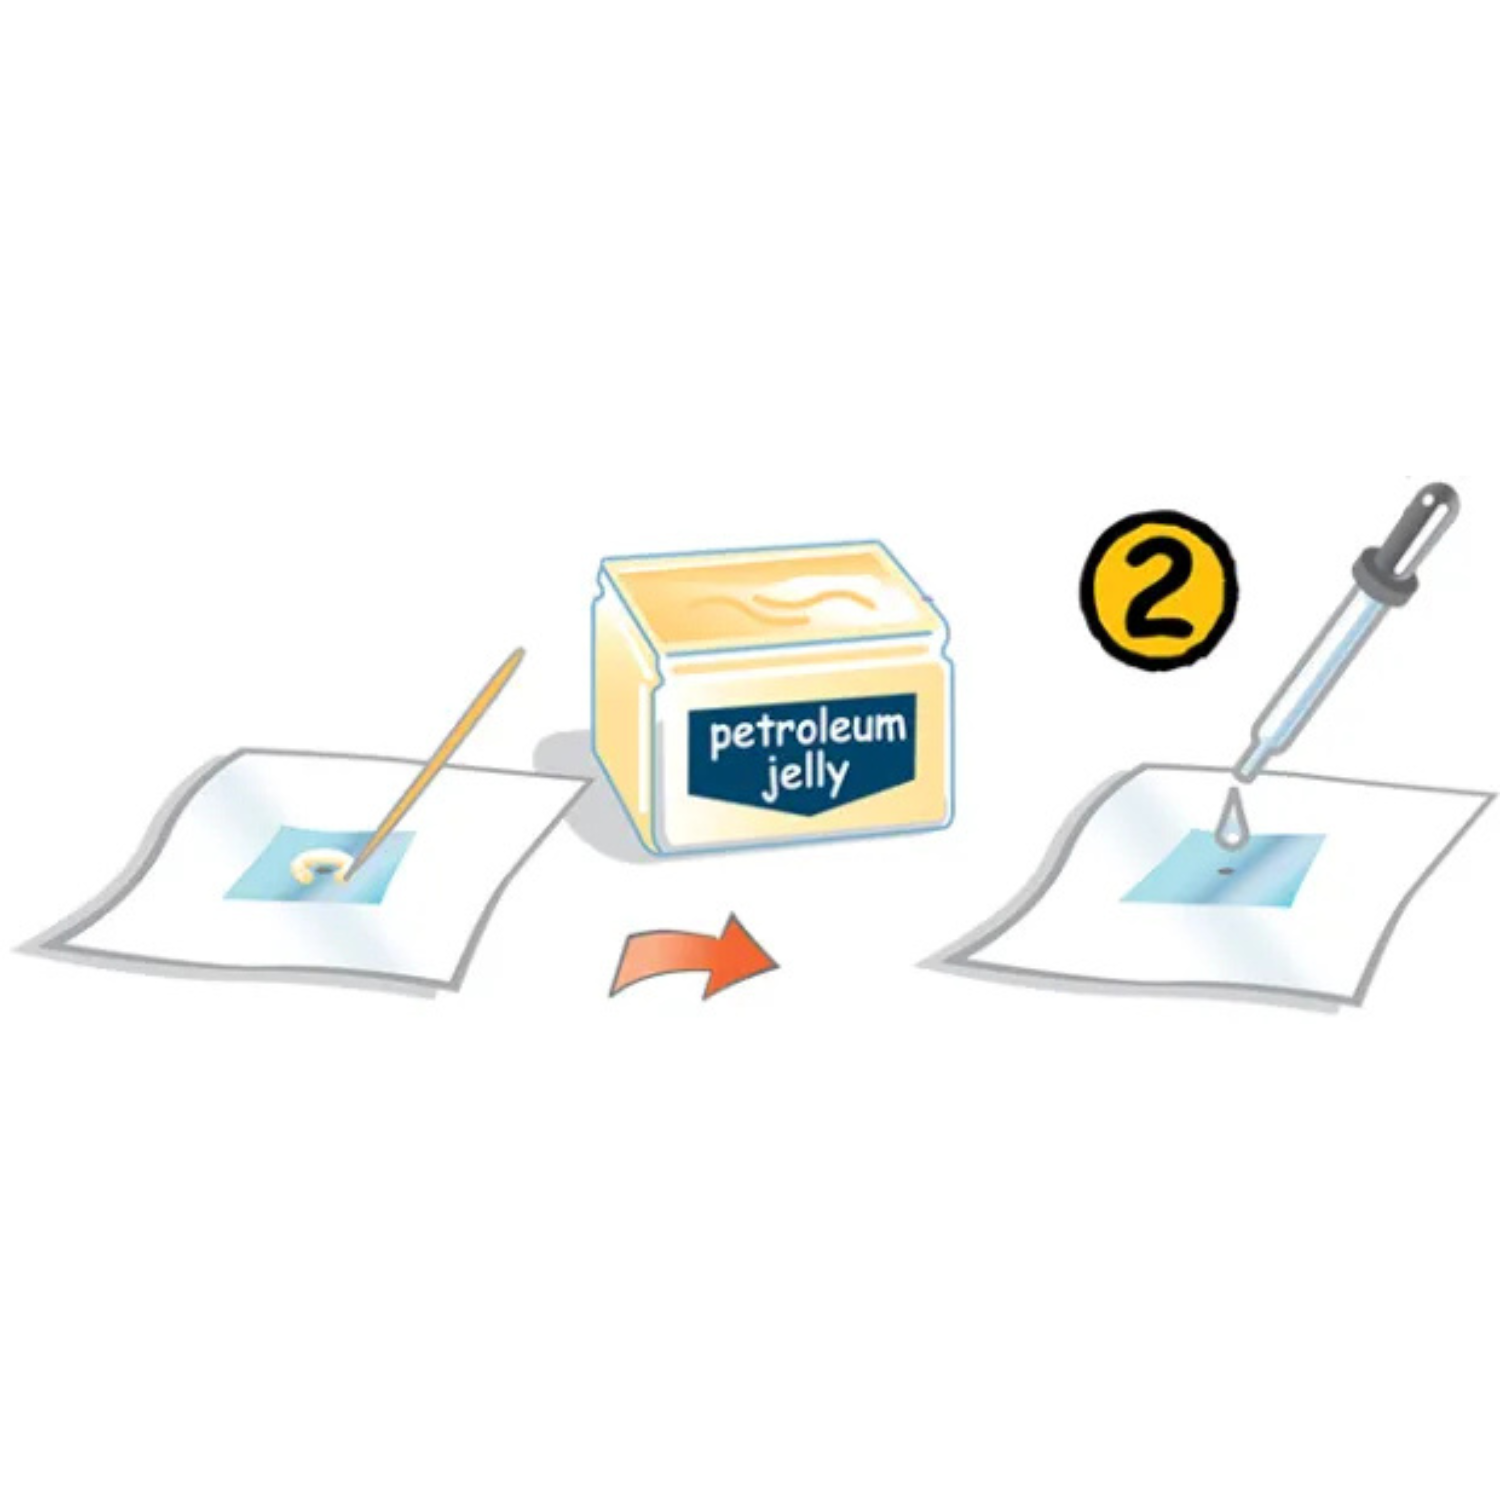
2. Add the Water Lens
Using a straw or dropper, carefully place a single small droplet of water directly in the center of the plastic window.
The droplet should form a rounded dome—this acts as the magnifying lens.
3. Use the Microscope
Place a small object (like a grain of salt or a piece of paper with tiny text) on a white background.
Hold the frame just above the object and look through the water droplet.
Move the frame up and down slowly to bring the image into focus.
For better visibility, shine a light source (flashlight or phone) on the object.

Build instructions provided by scoutlife.org
Submit Your STEM Kit Build Feedback:
After you complete your STEM Kit Build, complete the feedback survey to be entered into a quarterly raffle!