STEAM Ahead - Scientific Instruments STEAM Kit

STEAM KIT INTRODUCTION: 

This STEAM kit is designed to introduce students to the fundamental scientific instruments that allow us to measure and observe the world beyond our natural senses. You will complete three activities: Build a Thermometer, Build a Microscope, and Build a Stethoscope.

Select your activity below for instructions and additional information:

Build a Thermometer
Build a Microscope
Build a Stethoscope
 
unsplash-image-ynwGXMkpYcY.jpg

Build a Thermometer

Overview

A thermometer is an instrument used to measure temperature, or the degree of hotness or coldness of an object or environment.

It typically consists of two main parts:

  • A temperature sensor: In traditional thermometers, this is a bulb containing a liquid (like colored alcohol) that expands or contracts into a narrow tube. In digital versions, it's an electronic sensor.

  • A calibrated scale: This translates the change in the sensor into a numerical value, displayed either along the glass tube (in Celsius or Fahrenheit) or on a digital screen.

By providing a precise measurement of temperature, thermometers are essential for a wide range of applications, from detecting a fever in medicine and checking the weather to controlling cooking processes and conducting scientific experiments.

Did you know?

  • The very first thermometers, made around the time of Galileo, didn't use liquid; they worked by measuring how much air expanded or shrank when the temperature changed.

  • Not all thermometers are liquid or digital. A type invented in the 1800s uses a special metal strip that physically bends with temperature changes to move a pointer and show the reading.

  • Some modern thermometers can take your temperature from your eardrum by measuring the invisible infrared light that it gives off.


Design Challenge:

Explore how liquids expand and contract with temperature by building your own thermometer.

  • Build a thermometer using a bottle and straw, then use a marker to label the liquid's starting point at room temperature.

  • Place your thermometer in a bowl of warm water. How high does the colored liquid climb in the straw?

  • Now, move it to a bowl of cold water. Can you use these different points to create your own simple scale for "cold," "room temp," and "warm"?

Materials:

  • Clear plastic bottle (small water bottle or similar)

  • Straw (clear or light-colored)

  • Modeling clay or playdough

  • Rubbing alcohol (or water with a few drops of food coloring)

  • Food coloring (optional, for visibility)

  • Water

  • Permanent marker

  • Measuring cup

  • Bowl of warm water

  • Bowl of cold water (with ice, optional)


Build Instructions:

1. Prepare the Liquid

  • Mix equal parts water and rubbing alcohol in a measuring cup (about ½ cup total).

  • Add a few drops of food coloring to help see the liquid rise in the straw.

2. Fill the Bottle

  • Pour the colored liquid into the bottle, filling it about one-quarter full.

3. Insert the Straw

  • Place the straw into the bottle so it stands straight but does not touch the bottom.

  • Use modeling clay to seal around the straw opening tightly. Make sure no air can escape and the straw stays upright.

4. Mark the Starting Point

  • Use a permanent marker to draw a line on the straw at the top level of the liquid. Label it as your “starting point” or “room temperature.”

5. Test It!

  • Place the bottle in a bowl of warm water and observe the liquid rising in the straw.

  • Try it again in cold water and observe the liquid level drop.

Build instructions provided by Sciencebuddies.org


Submit Your STEM Kit Build Feedback:

After you complete your STEM Kit Build, complete the feedback survey to be entered into a quarterly raffle!

Submit your STEM Kit Build Feedback
 
unsplash-image-bcqDxjddPGk.jpg

Build a Microscope

Overview

A microscope is a scientific instrument used to view objects that are too small to be seen by the naked eye. It is composed of one or more lenses that produce an enlarged image of a specimen. The main components include:

  • Eyepiece (or ocular): The lens the viewer looks through.

  • Objective Lenses: A set of lenses on a rotating turret, offering different levels of magnification (e.g., 4x, 10x, 40x).

  • Stage: A flat platform where the specimen slide is placed.

  • Illuminator and Diaphragm: The light source and an adjustable aperture that controls the amount and cone of light passing through the specimen to adjust brightness and contrast.

Did you know?

  • The earliest microscopes were known as “flea glasses” because they were used to study small insects.

  • Anton van Leeuwenhoek engineered high-powered lenses that allowed him to discover a world of teeming bacteria in a single drop of water.

  • Robert Hooke is credited with discovering the cell after he observed the small, honeycomb-like compartments in a piece of cork with his microscope.


Design Challenge:

Explore how a simple water drop can act as a lens to magnify the hidden world around you.

  • Build a water-drop microscope and look at a single crystal of salt. What is its true shape?

  • Now, add another drop of water directly onto the salt crystal and watch what happens to its structure.

  • Look at a white phone screen through your lens. Can you see the tiny red, green, and blue lights?

Materials:

  • Ziplock bag (cut a flat, clear piece from the side)

  • Index card, cardstock, or thick paper

  • Tape or rubber band

  • Scissors

  • Water

  • Straw or dropper

  • White paper or small dish

  • Small items to examine (e.g., sugar, salt, thread, printed text)

  • Flashlight or phone light (optional)


Build Instructions:

1. Prepare the Frame

  • Cut a square window (about 1–1.5 inches wide) in the center of your index card or cardstock.

  • Cut a flat, clear piece of plastic from the ziplock bag (larger than the hole).

  • Tape or rubber band the plastic tightly over the window—try to make it as smooth and wrinkle-free as possible.

2. Add the Water Lens

  • Using a straw or dropper, carefully place a single small droplet of water directly in the center of the plastic window.

  • The droplet should form a rounded dome—this acts as the magnifying lens.

3. Use the Microscope

  • Place a small object (like a grain of salt or a piece of paper with tiny text) on a white background.

  • Hold the frame just above the object and look through the water droplet.

  • Move the frame up and down slowly to bring the image into focus.

  • For better visibility, shine a light source (flashlight or phone) on the object.

Build instructions provided by scoutlife.org


Submit Your STEM Kit Build Feedback:

After you complete your STEM Kit Build, complete the feedback survey to be entered into a quarterly raffle!

Submit your STEM Kit Build Feedback
 
unsplash-image-en53Cos2qBA.jpg

Build a Stethoscope

Overview

A stethoscope is a medical instrument used by healthcare professionals to listen to sounds inside the body, primarily the heart, lungs, and intestines.

It consists of a small disc-shaped resonator called a chest piece, which is placed against the patient’s skin, and connected to earpieces via flexible tubing. The chest piece often has two sides:

  • Diaphragm for high-frequency sounds (like heartbeats)

  • Bell for low-frequency sounds (like certain lung or vascular noises).

By amplifying internal sounds, the stethoscope helps doctors assess health, detect abnormalities, and monitor conditions such as irregular heartbeats, respiratory issues, or blood flow problems.

Did you know?

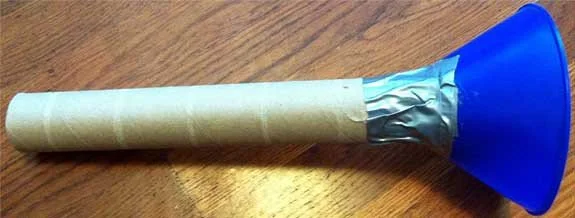
  • The stethoscope was invented in 1816 by a French doctor named René Laennec. He felt awkward putting his ear directly on a patient’s chest, so he rolled up paper to listen; and that’s how the first stethoscope was born.

  • The earpieces curve toward the nose because sound travels better when they point toward the ear canal. If they’re backward, the sound gets muffled!

  • Stethoscopes don’t just check hearts, they also let doctors listen to lungs and even tummy gurgles.


Design Challenge:

Explore how sound travels through a stethoscope and how doctors listen to your body.

  • Listen to your chest before and after exercise. What changes?

  • Try using a metal funnel. Does it sound different?

  • Put the funnel on a door or table — can you hear tapping on the other side?

Materials needed:

  • 2 feet (about 60 cm) of flexible plastic tubing (clear aquarium tubing or similar)

  • 1 small plastic funnel

  • 1 balloon

  • Scissors

  • Tape or rubber bands


Build Instructions:

  1. Cut the balloon in half and keep the round part. Stretch it tightly over the wide end of the funnel. Secure with a rubber band or tape to keep it in place.

  2. Push one end of the plastic tubing onto the narrow end of the funnel. Make sure it’s snug — this creates your “sound pickup.”

  3. Hold the other end of the tubing up to your ear.

  4. Place the funnel (balloon side down) against someone’s chest, your own, or even a tabletop. Listen closely — can you hear a heartbeat or vibrations?


Build instructions provided by Science Buddies


Submit Your STEM Kit Build Feedback:

After you complete your STEM Kit Build, complete the feedback survey to be entered into a quarterly raffle!

Submit your STEM Kit Build Feedback